I promise I don’t post every single one of these! I do enjoy making them though. Bags like these are super easy to make, especially while doing something else. Because gauge doesn’t matter, I can switch between whatever needles or yarns strike my fancy. And they are useful gifts!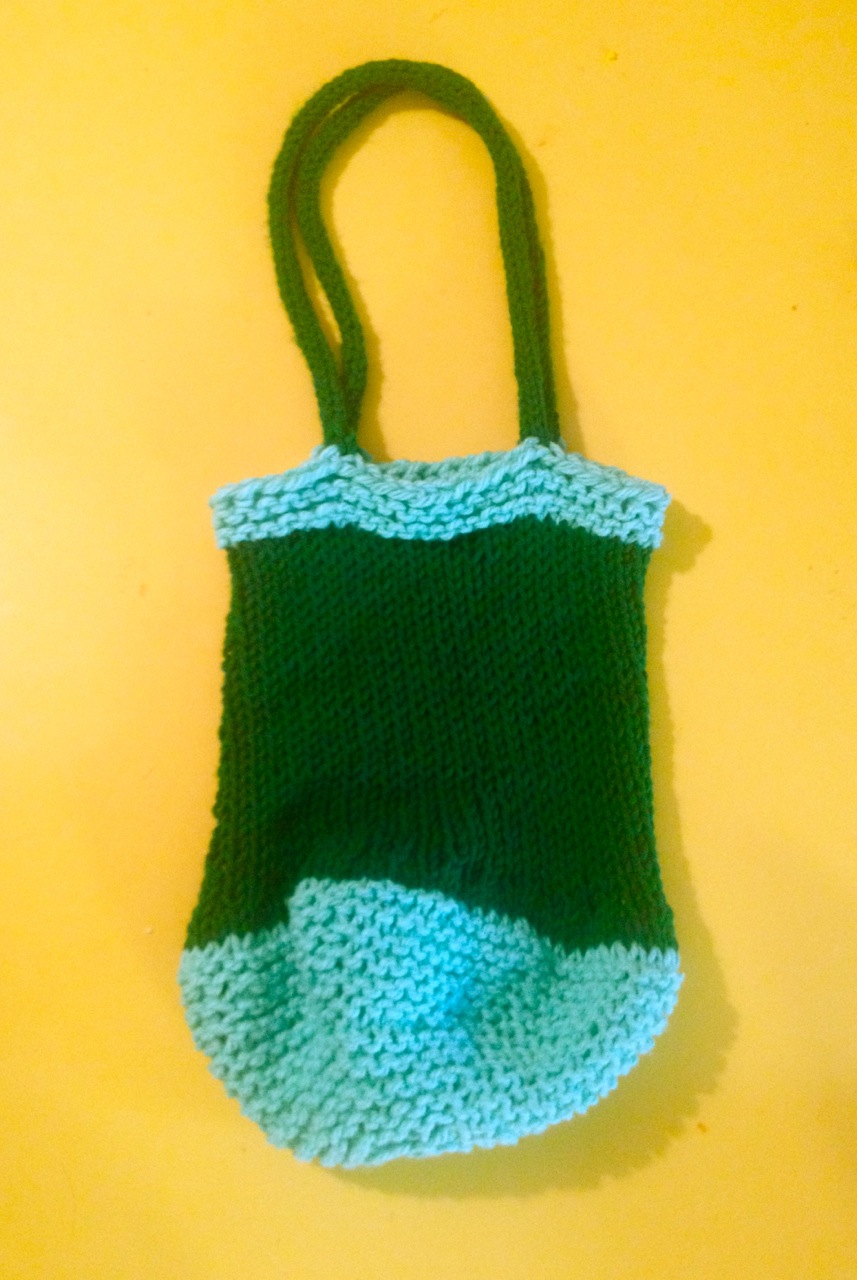
This bag uses more chunky acrylic yarn for the bottom, and leftover worsted acrylic for the body. I’m slowly making my way through my stash!
 Keep reading for instructions to knit your own.
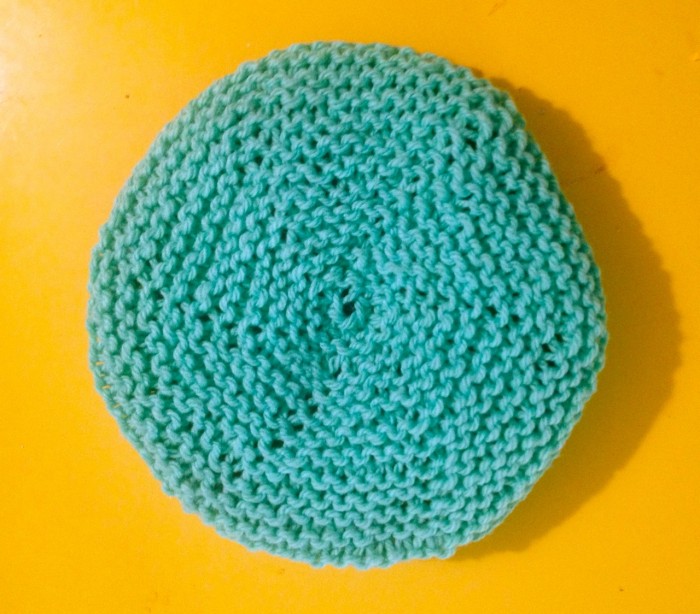
I wanted to use a concentric garter stitch for the bottom of the bag, and this is basically how I did it:
CO 6 stitches, placing a marker between each stitch, with a special marker for the beginning of round
row 1: *slip marker, increase 1 stitch, repeat from * (I used kfb, but I think this would look neat with a YO)
row 2: purl all stitches
row 3: *slip marker, work 1 increase, knit to marker, repeat from *
And then you work rounds 2 & 3 until the base is as big as you want.
I continued until I had 12 stitches between each marker, then worked a couple rounds alternating between all purls and all knit stitches without increasing. To conserve yarn when I switched to my worsted, I knit 2 rounds in the contrast color, then worked the third round as k1, k2tog. Round 4 and up was all knit.
Next time I make a bag, I will skip the k1, k2tog row, and just knit all the stitches for the body of the bag (or make the base smaller).
During my last bag, I got burned out on YO, k2tog mesh. Though I like the look, I can never get into a rhythm with that pattern. This time, I knit my worsted weight on size 10.5 (6.5 mm) needles to get an open fabric, and this project was finished in a flash!
The light green top is 4 rounds of garter stitch, and the handles are i-cord.
If anyone uses this pattern for their own bag, I’d love to see the results!
